Refresh this page to invite more people and get the cool gift 🔥

How to Set Up a DMARC Record for Google Workspace

Stop criminals from abusing your sending domain to commit cybercrimes!
Set up a DMARC for your Google Workspace account today.
We will guide you through the process of setting up a DMARC in no time.
With a DMARC record in place, your emails will be more secure and have a better chance to land in your audience’s inbox. 👍
⚠️ Warning: Set up your SPF and DKIM records before your DMARC record! There should be a consistent record of successful SPF and DKIM authentication for at least 48 hours before enabling DMARC.
Why You Need to Set Up a DMARC Record for Google Workspace
Bad guys can make it seem like an email was sent from your domain when it really wasn’t. This is called email spoofing.
DMARC helps ensure that only legitimate senders can use a domain for sending emails.
By using a DMARC record, the receiving email server can verify that the email really comes from the claimed domain and corresponds to both the SPF and DKIM records. If it doesn’t, the email either lands in the spam folder or gets rejected altogether and bounces.
💡 Additionally, starting from February 2024, senders who exceed 5,000 daily emails to Google and Yahoo! accounts will be required to enforce an active DMARC policy.
So now that you understand the importance of having a DMARC record in place, it’s time to actually configure one:
Step 1: Get Your DMARC Record Ready
A DMARC record is a line of text that instructs email servers on what to do when email messages fail authentication.
A DMARC record may look like this:
➡️ v=DMARC1; p=none; rua=mailto:youremail@yourdomain.com
While it may initially seem complicated, the record has distinct parts that are easy to understand.
Here are its three key elements:
- The “v” stands for the version of DMARC being used. There’s only one valid version currently, so this shouldn’t concern you. It’s always ‘v=DMARC1’.
- The “p” means policy: This determines what action email providers should take in case emails fail authentication. There are three options here:
- “none” = do nothing. This option is good for monitoring DMARC reports and making necessary adjustments, but it does not provide any protection against unauthorized emails. “None” is a good start for initial DMARC implementation.*
- “quarantine” = emails that fail authentication go to the spam folder.
- “reject” = failed emails do not get delivered. You should only use ‘reject’ when you know the DMARC reports are accurate.
- The rua tag tells email providers where to send your DMARC reports. In this case, it should be your email address preceded by “mailto:”. - You can include multiple email addresses as long as you separate them by commas.
*A stricter value than “none” is necessary later on, but for now, you want to be able to identify delivery problems without accidentally quarantining or rejecting emails.
Step 2: Access Your Domain’s DNS Settings Page
You’re setting up a DMARC record to send emails from your Google Workspace account (Gmail).
But that doesn’t mean you have to set up the record in Google’s settings.
Instead, you must add the DMARC record to your domain provider’s DNS settings (Namecheap, GoDaddy, etc.).
So, log in to your domain provider account and look for the DNS management or DNS settings section. It could also be called Name Server Management, or perhaps you’ll find it under Advanced Settings.
You should be able to locate it but if you can’t, ask your domain provider.
Step 3️: Add Your DMARC to Your Domain’s DNS Records
Once inside your domain’s DNS settings you should see a list of other DNS records already there.
You can leave them alone. We’re only interested in adding the DMARC record.
So look for a button that says something like “Add a new record” and click on it.
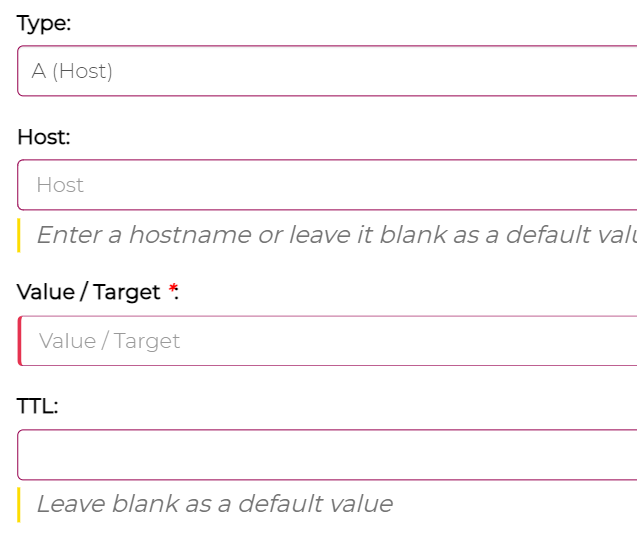
Usually, you now have to specify the type of record you want to add. In this case, we must create a TXT(text) record.
Then, under host, enter the value ‘_DMARC’. Your domain or hosting provider will likely automatically append the domain after that value.
Next up is the value field (sometimes named target). This is where you add the actual DMARC record we created in the first step. Don’t forget to adjust the record to your domain and email address:
➡️ v=DMARC1; p=none; rua=mailto:youremail@yourdomain.com
Now, hit save!
Step 4️: Validate That You Set up the Record Correctly
After setting up your DMARC record, it can take up to 48 hours for the DNS to update. Usually, it’s much sooner, but please take this into account.
You can use a DMARC checker to verify that your record is active.
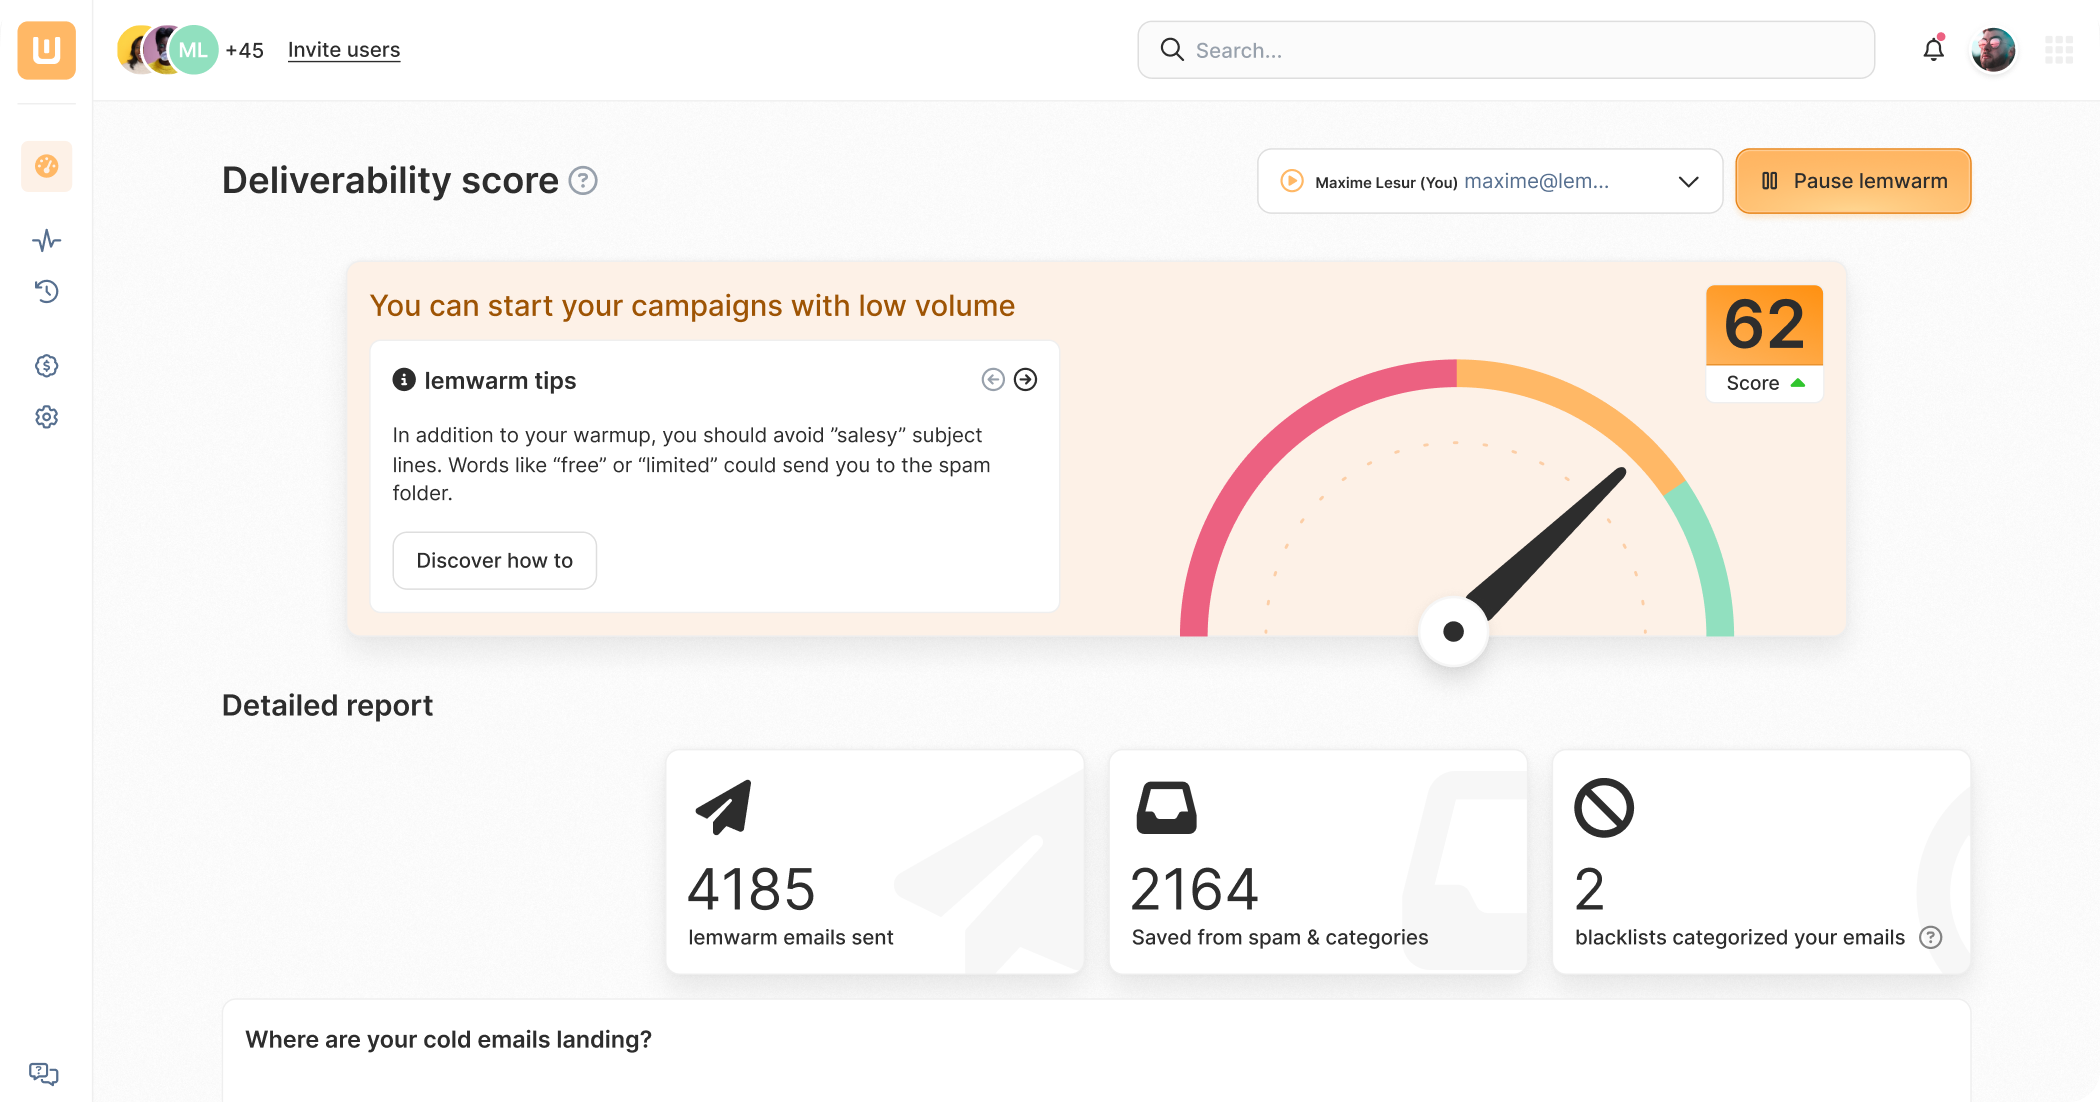
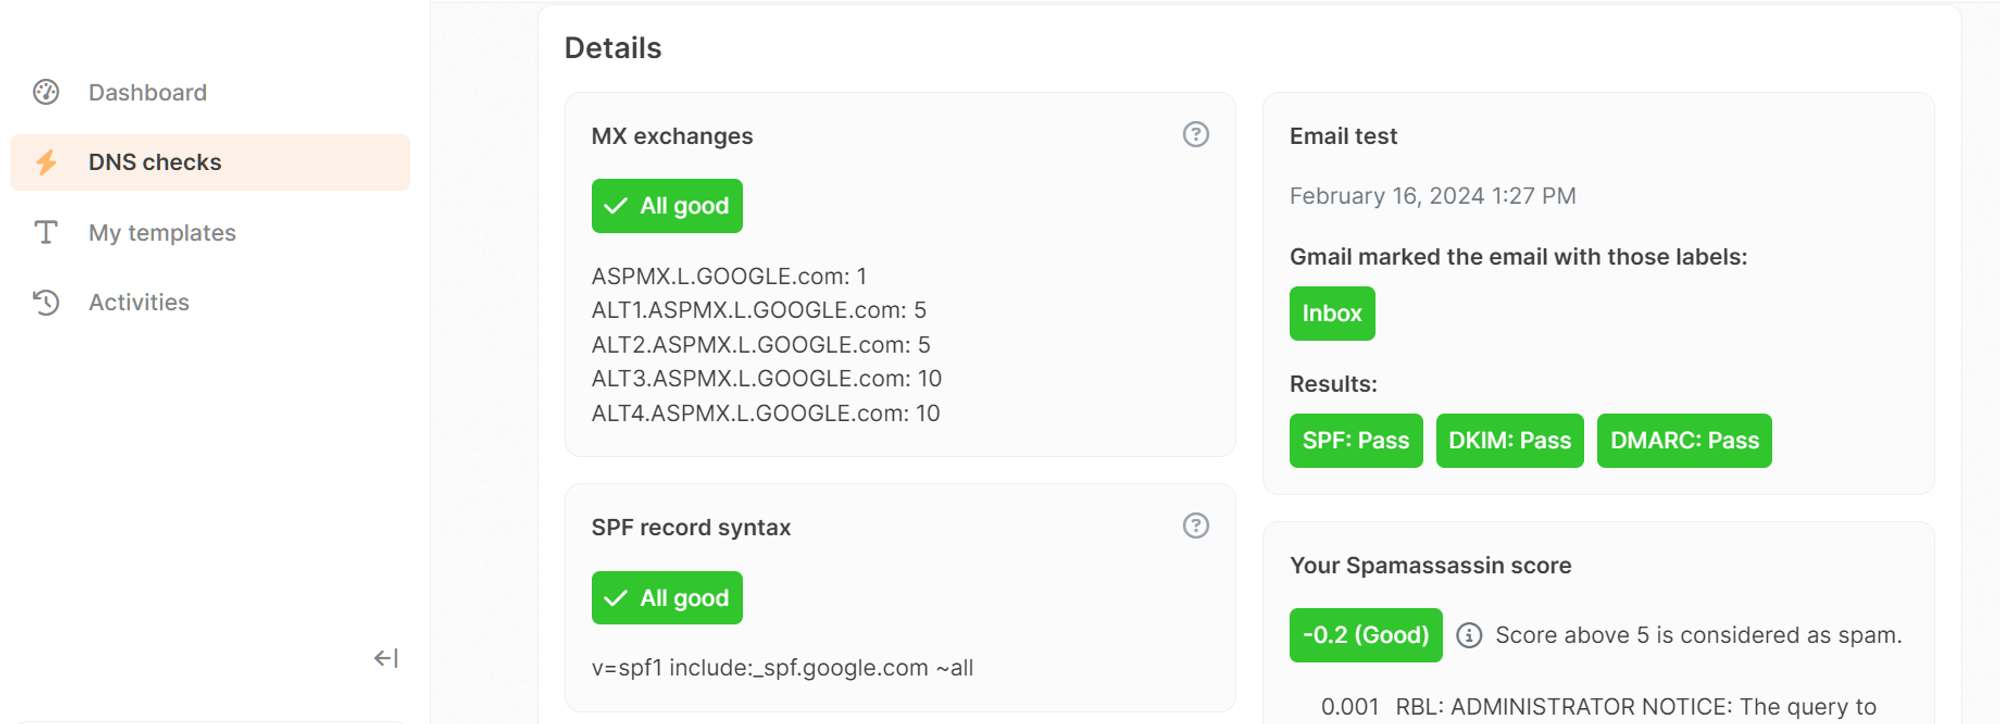
You can also use lemwarm’s DNS Checks feature. It not only tells you if your DMARC record is in order, but it also gives you essential information on your SPF, MX, and DKIM records.
All of lemwarm’s features are designed to help keep your emails out of the spam folder.
What Other Technical Settings Do I Need to Configure?
Congratulations on setting up your DMARC record!
Please check the list below to see what other configurations you have to complete:
- MX Records (To be done before setting up DMARC)
- SPF records (To be done before setting up DMARC)
- DKIM records (To be done before setting up DMARC)
- Custom tracking domain
If you’re using a new email address or domain, it’s also wise to warm up your email. Not doing so may result in your emails landing in spam.
Email warm-up involves gradually increasing sending volume and frequency while also getting engagement for your emails.
An email warm-up service like lemwarm also makes completing your technical setup easier through its DNS Checks and extensive support documentation.


Send emails that actually get delivered with