How to manage your plan, billing, and seats in lemwarm
January 30, 2025
|6 min read
Managing billing in lemwarm goes beyond checking invoices. It also helps you keep payment details accurate, control who has access, and make sure each team is billed correctly.
Learning objective
By the end of this tutorial, you’ll know how to open Plans & Billing, review and update billing details, manage invoices and invoice recipients, adjust your lemwarm plan, control seat access, and switch between teams when needed.
Why this matters
Your Plans & Billing area is where financial control and team access meet. When you know how to manage this workflow, you can avoid billing surprises, keep subscription details accurate, and make sure you only pay for the seats your team is actually using.
Prerequisites
- You should already know how to log in to lemwarm and navigate your workspace.
- You should already have Admin permissions, since only Admins can access billing settings.
- You should already know which team you want to manage before making billing or seat changes.
Core lesson — step-by-step workflow
Phase 1: Open the Plans & Billing workspace
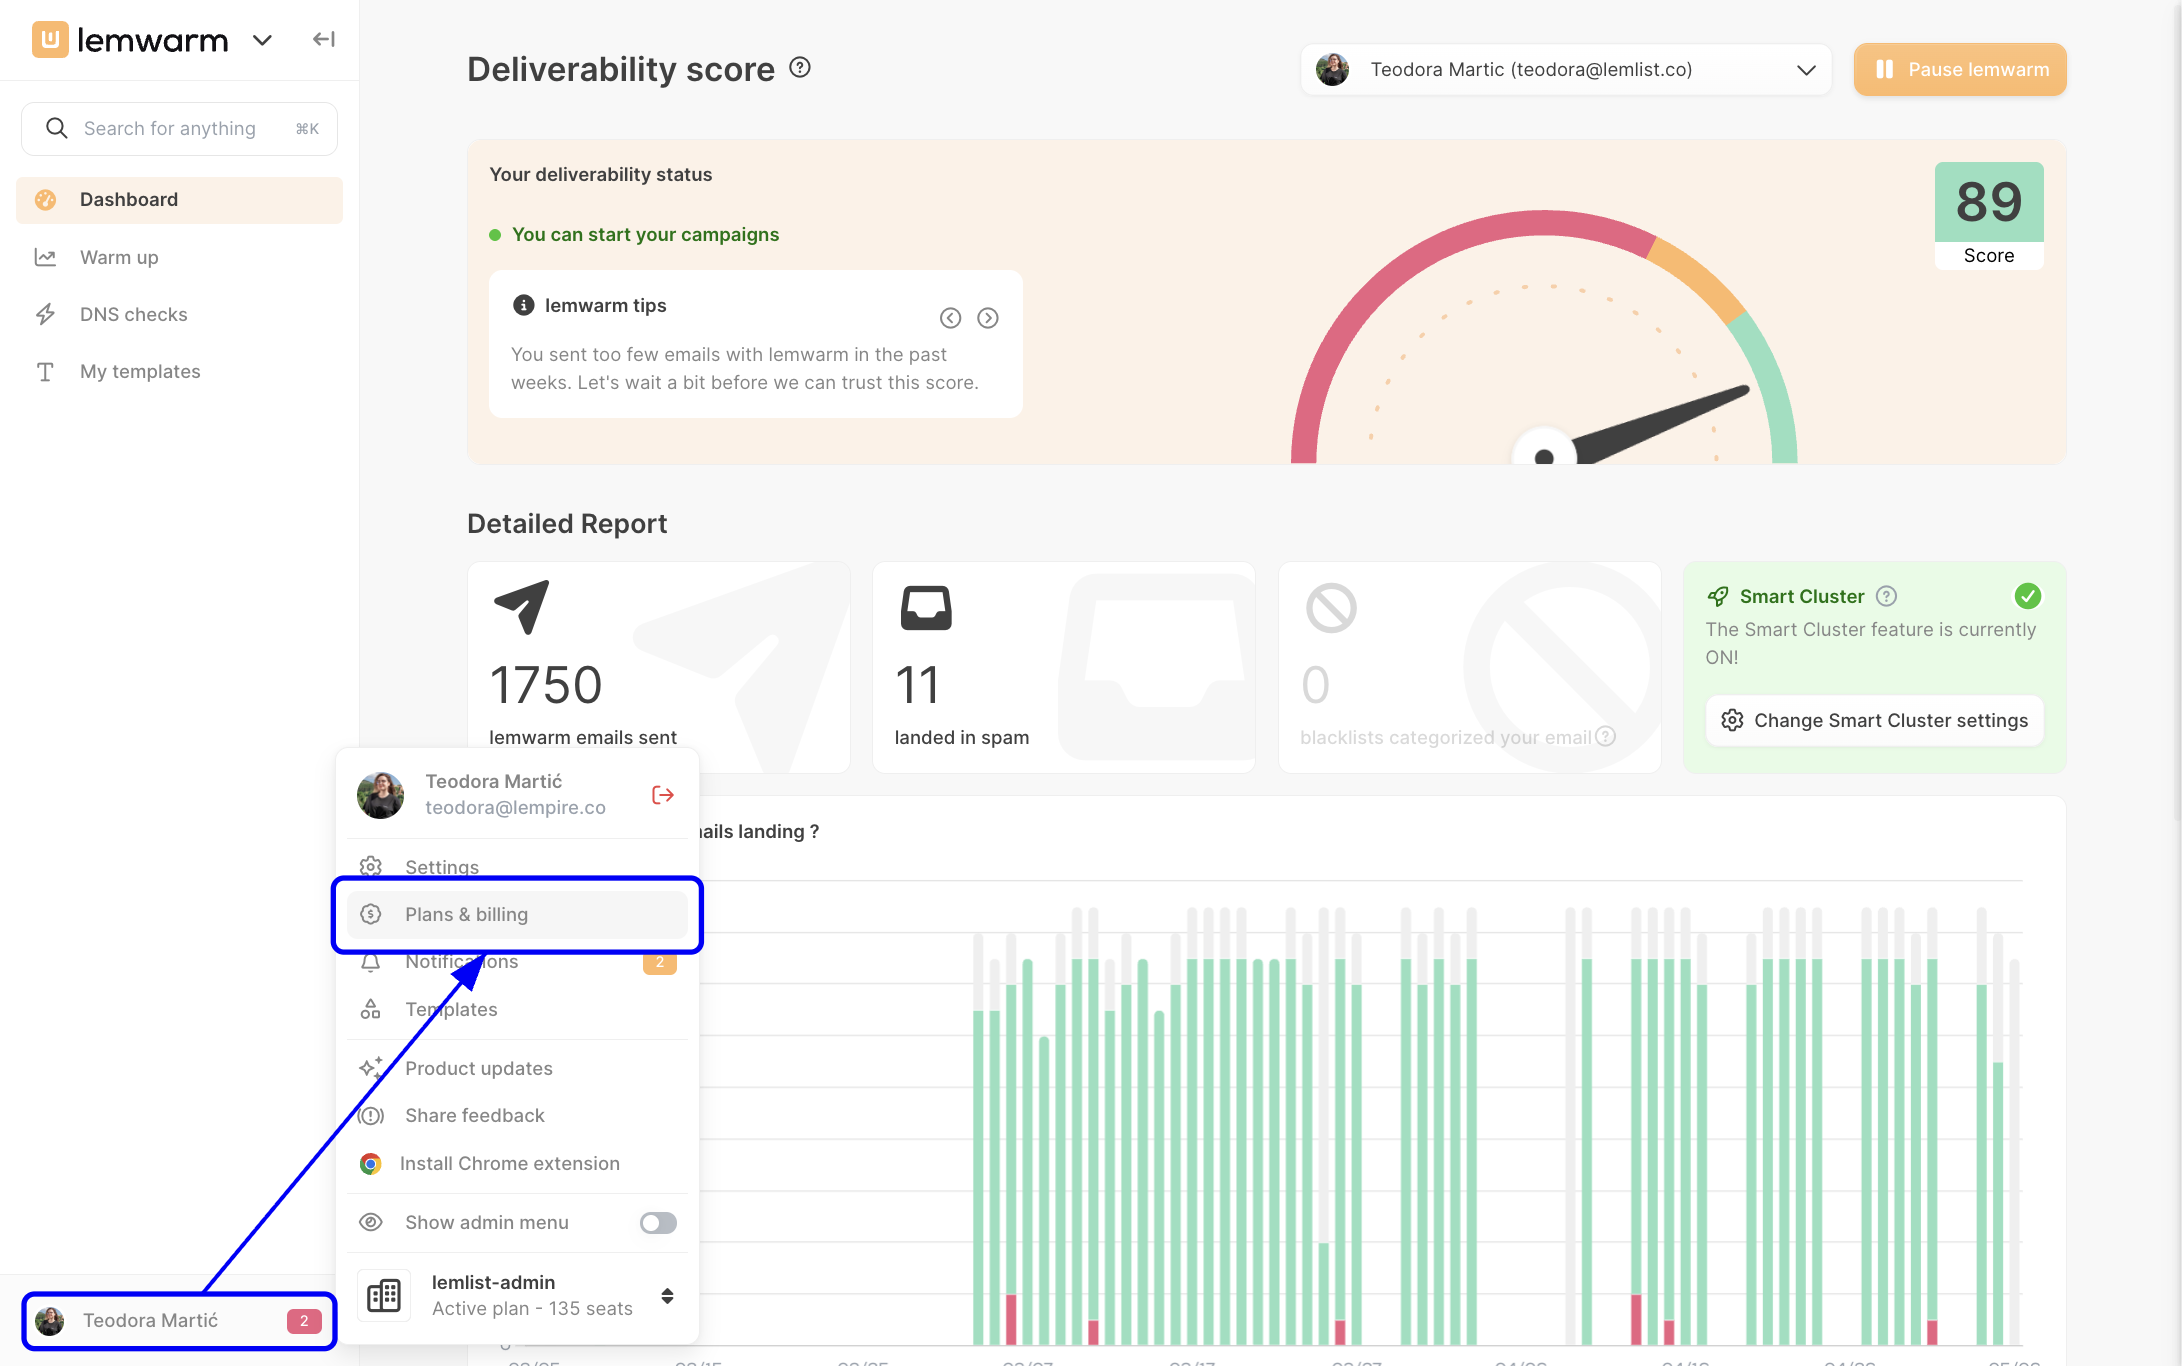
Open billing settings from your profile menu
Click your name in the bottom-left corner of the app, then select Plans & billing. This opens the billing workspace for your current team, which is the starting point for invoices, payment details, plan changes, and seat management.
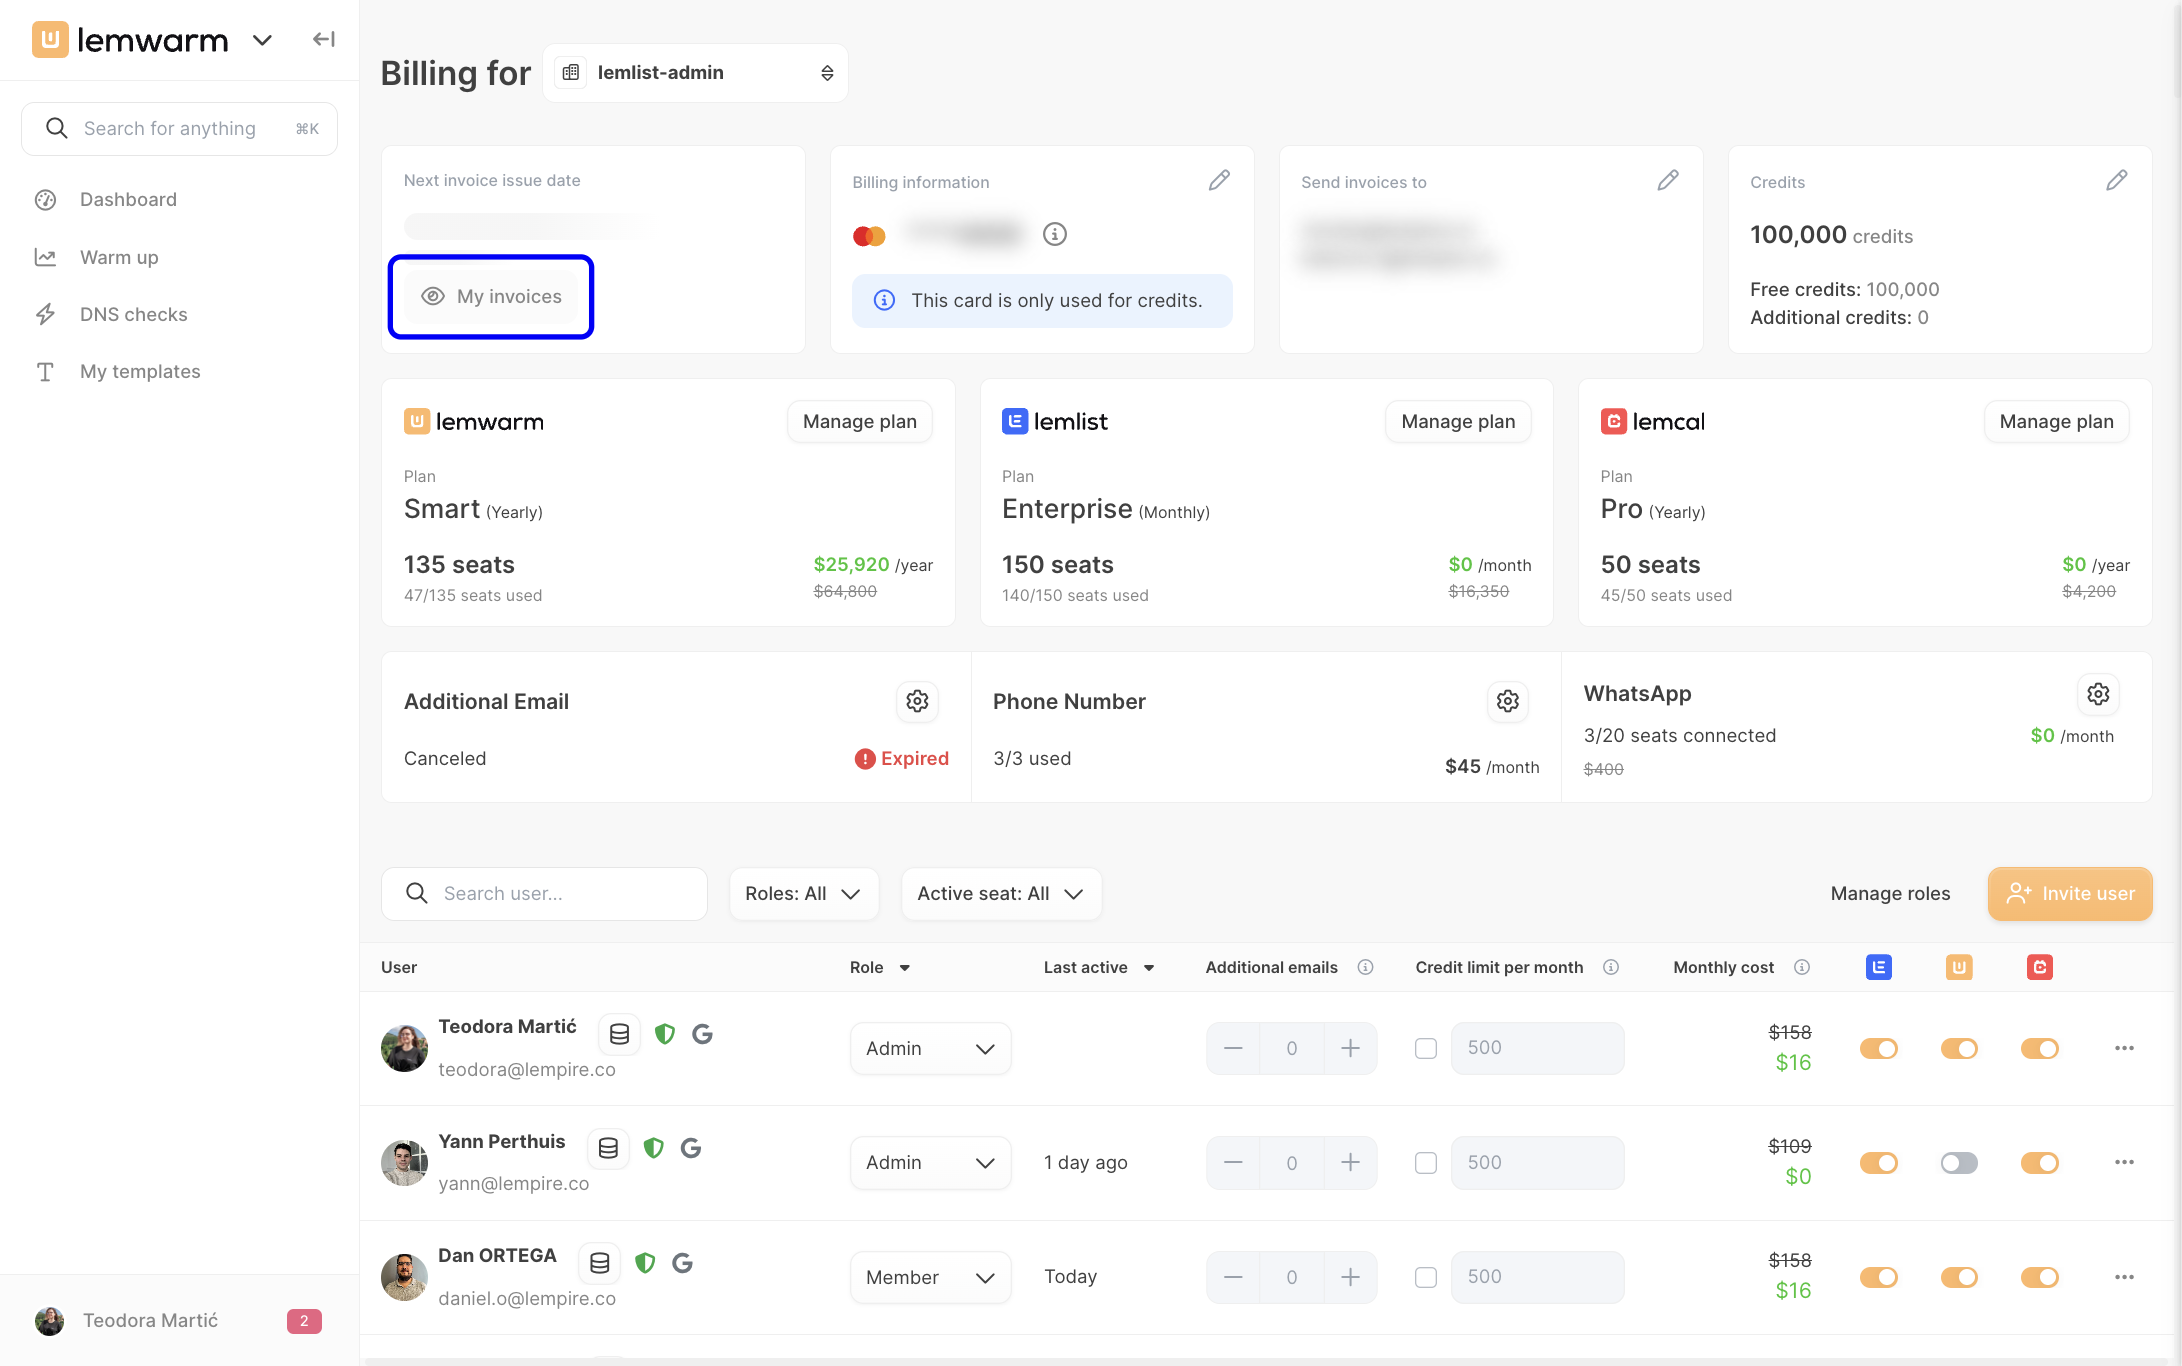
Phase 2: Review your billing overview and invoices
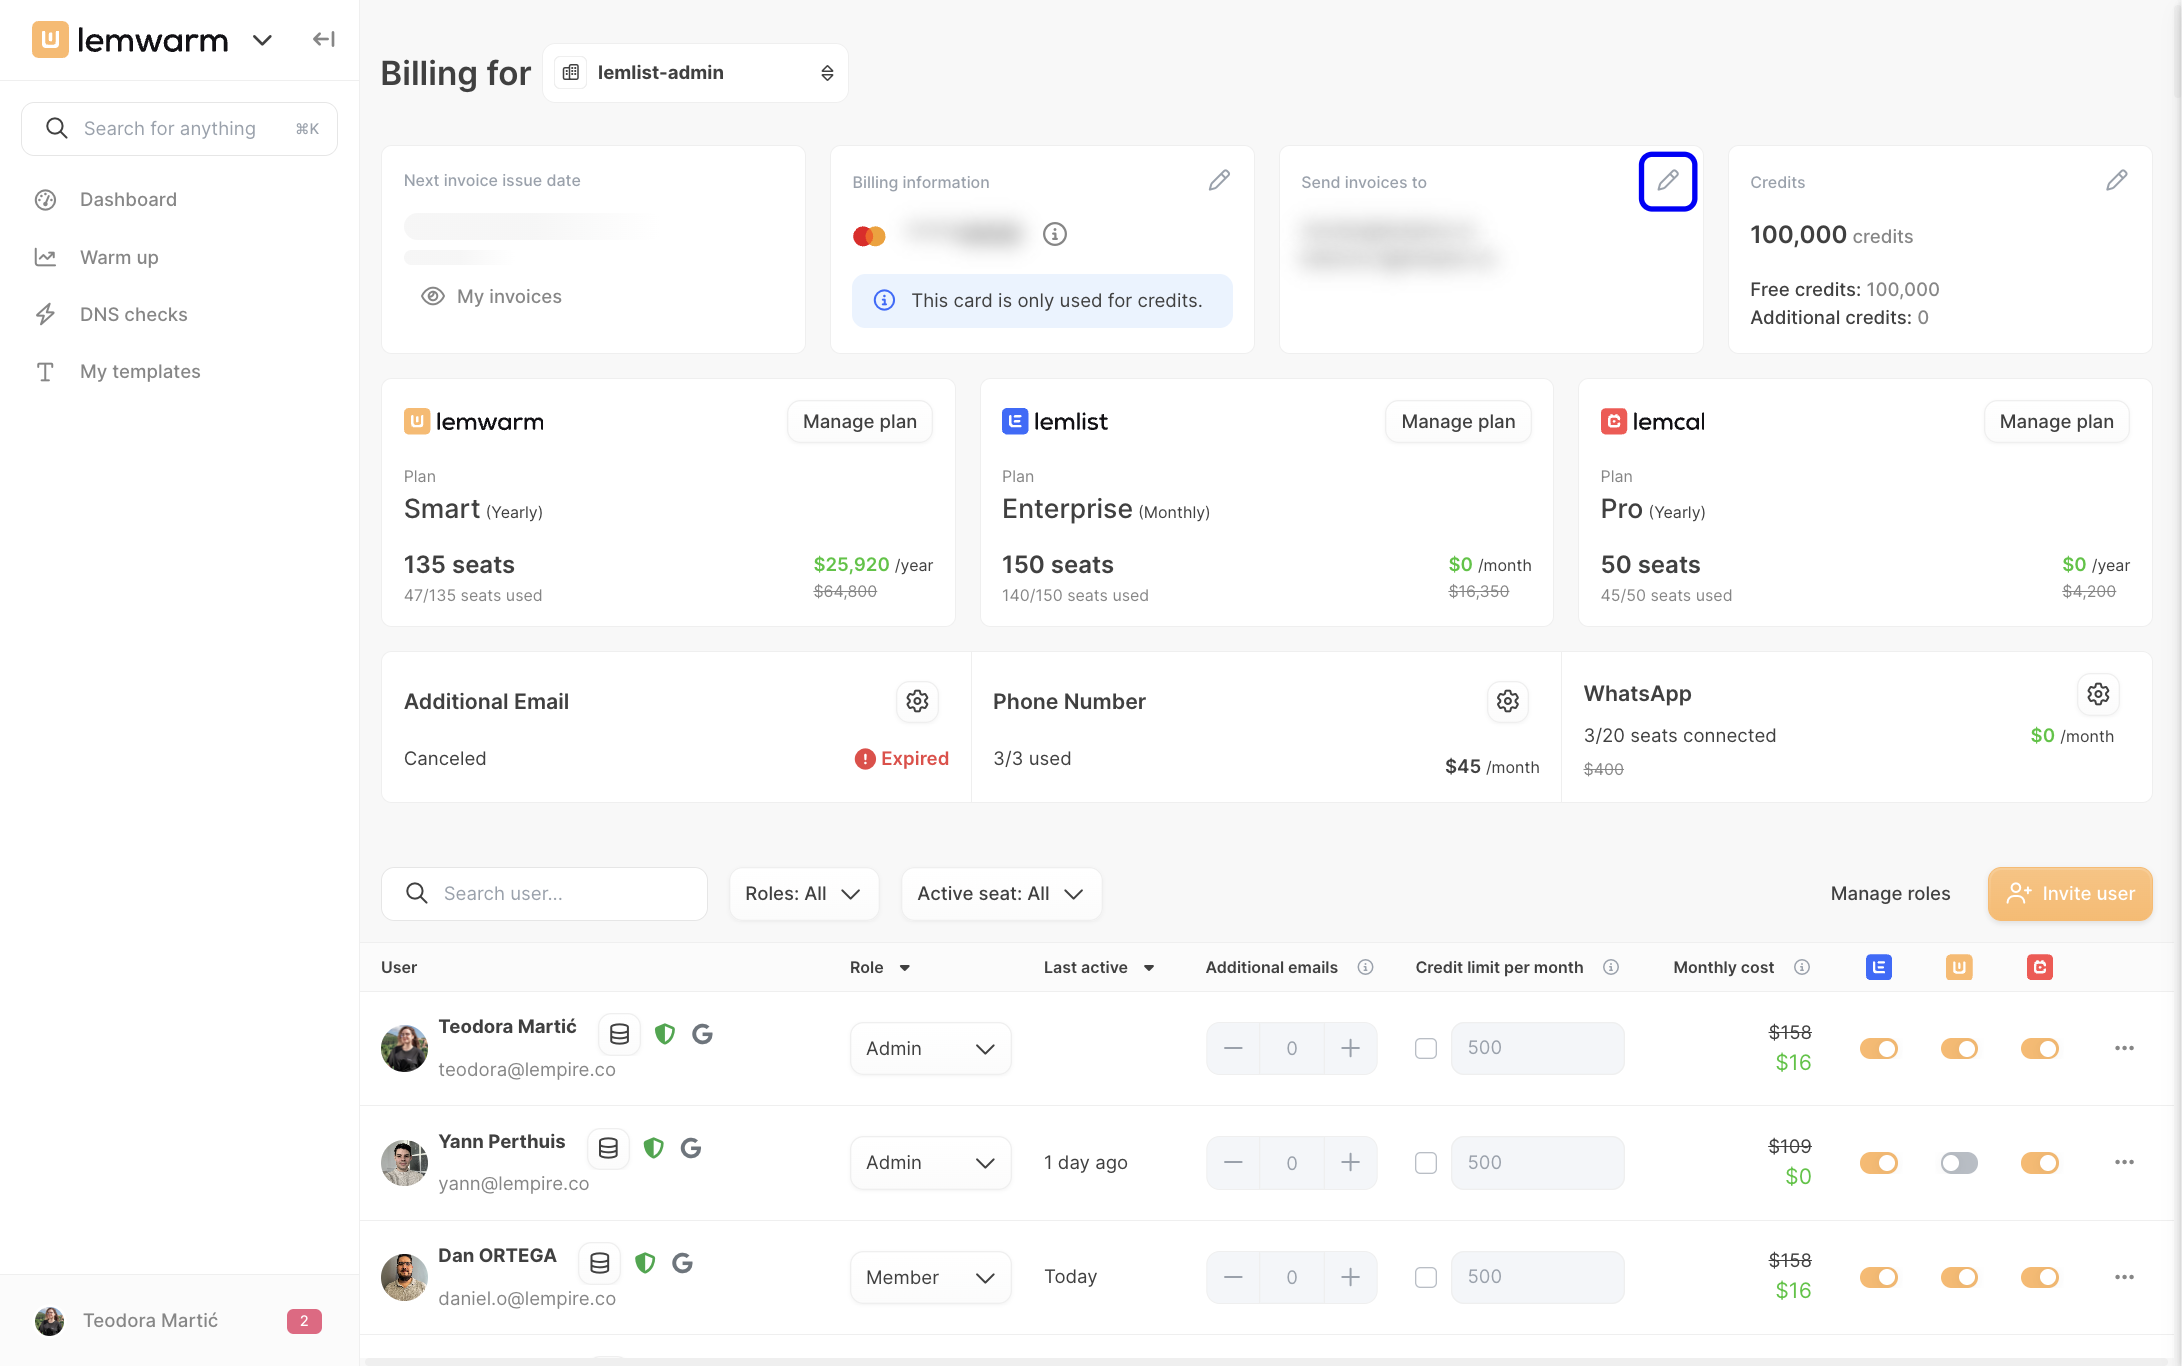
When the billing page opens, you’ll see a full overview of your current team’s billing setup, including your next invoice date, billing information, invoice recipients, available credits, active plans, and assigned seats. This page acts as your main control center, so it’s worth scanning it before making any changes.
In the billing overview, click My invoices to review past invoices and check upcoming billing activity. This is useful when you need records for accounting, want to confirm charges, or need to download invoices for your internal team.
Phase 3: Update payment and invoice information
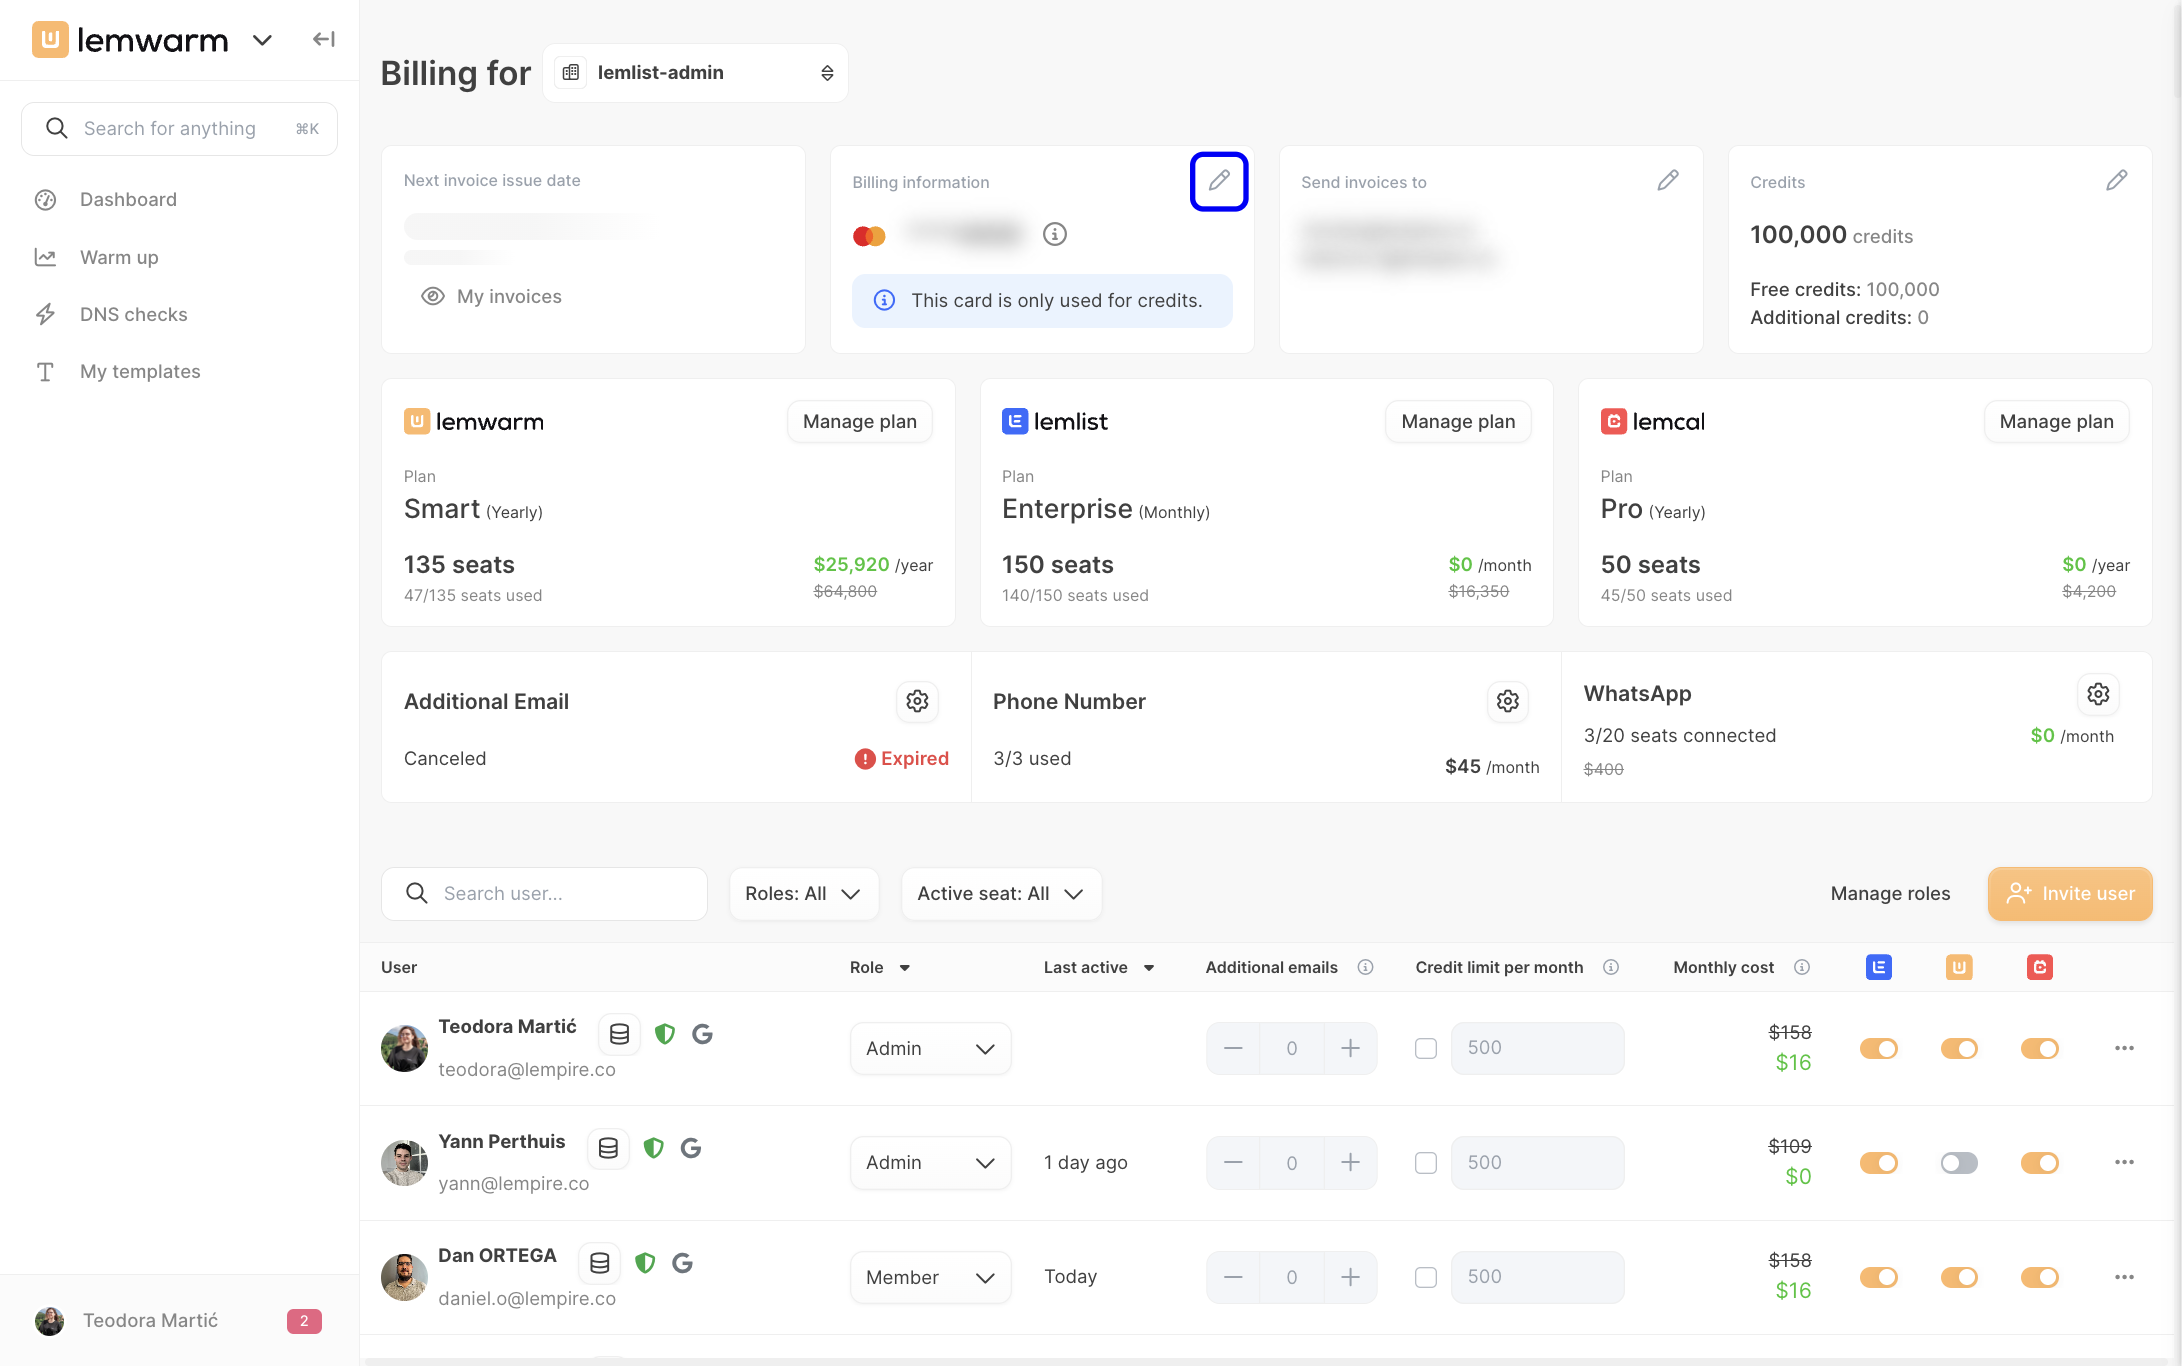
Step 1: Edit your payment method
In the Billing information card, click the pen icon. This is where you manage the payment method tied to your account, which is especially important if your card has changed or your finance team needs updated billing details.
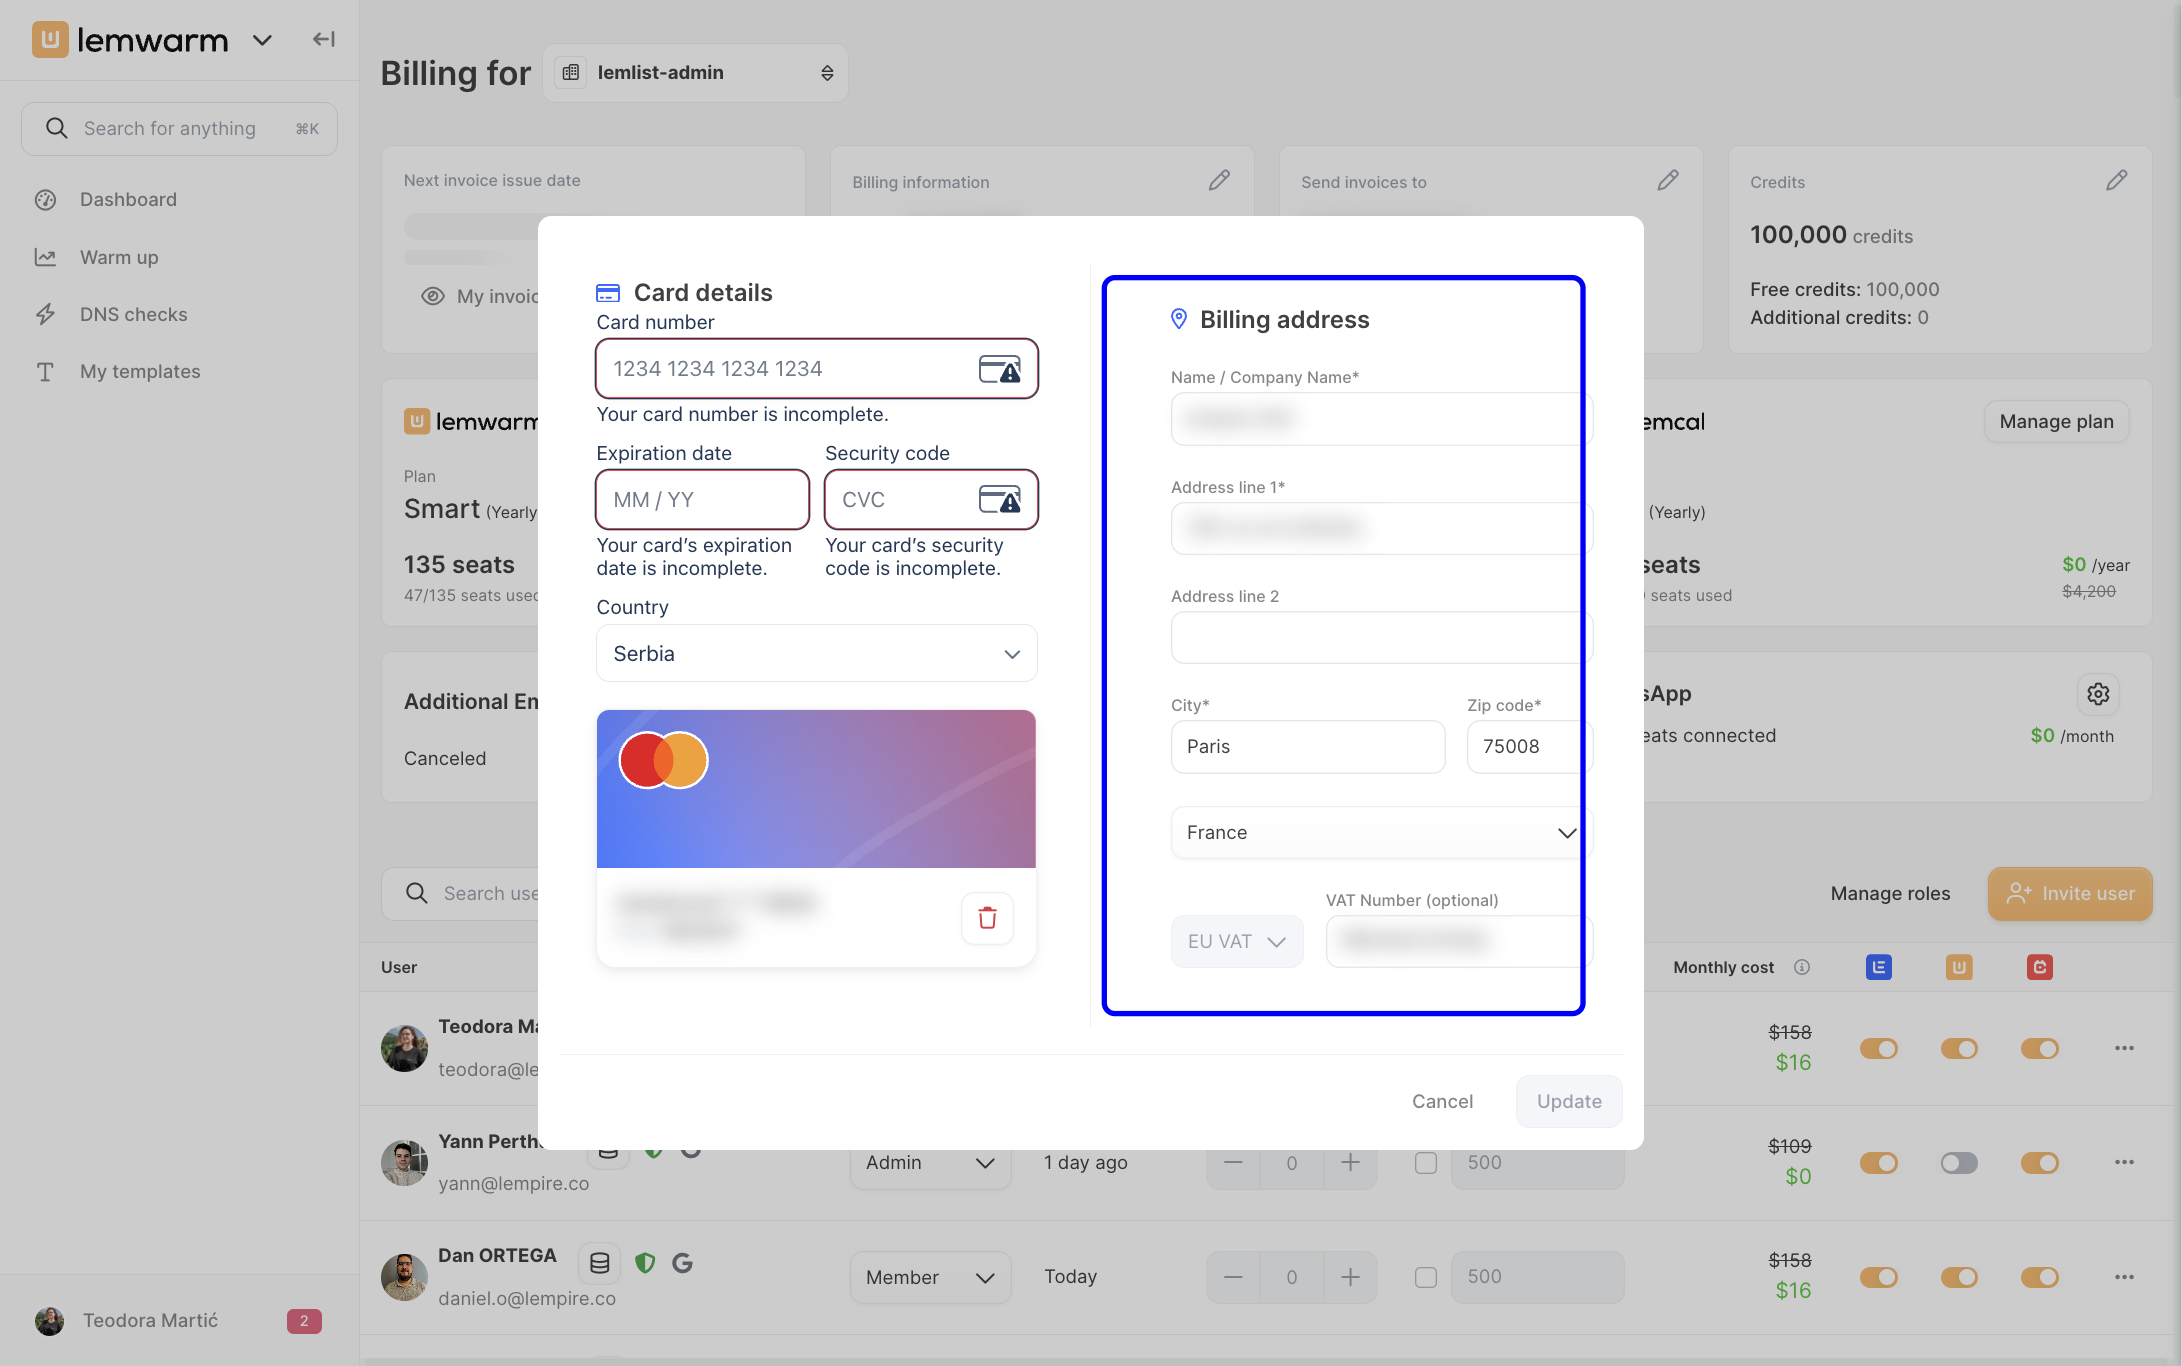
Step 2: Update card details and billing address
When the billing details window opens, update your card details and billing address, then save your changes. Keeping both sections accurate helps prevent failed payments and ensures your invoices reflect the correct business information.
Step 3: Update invoice recipients
In the Send invoices to section, click the pen icon to add or edit invoice recipient email addresses. Use this if invoices should go to your finance team, a shared billing inbox, or another admin who needs visibility into charges.
Phase 4: Update your lemwarm plan
Step 1: Open plan management
In the lemwarm plan card, click Manage plan. This is where you update your subscription based on how your team is growing, shrinking, or changing its billing needs.
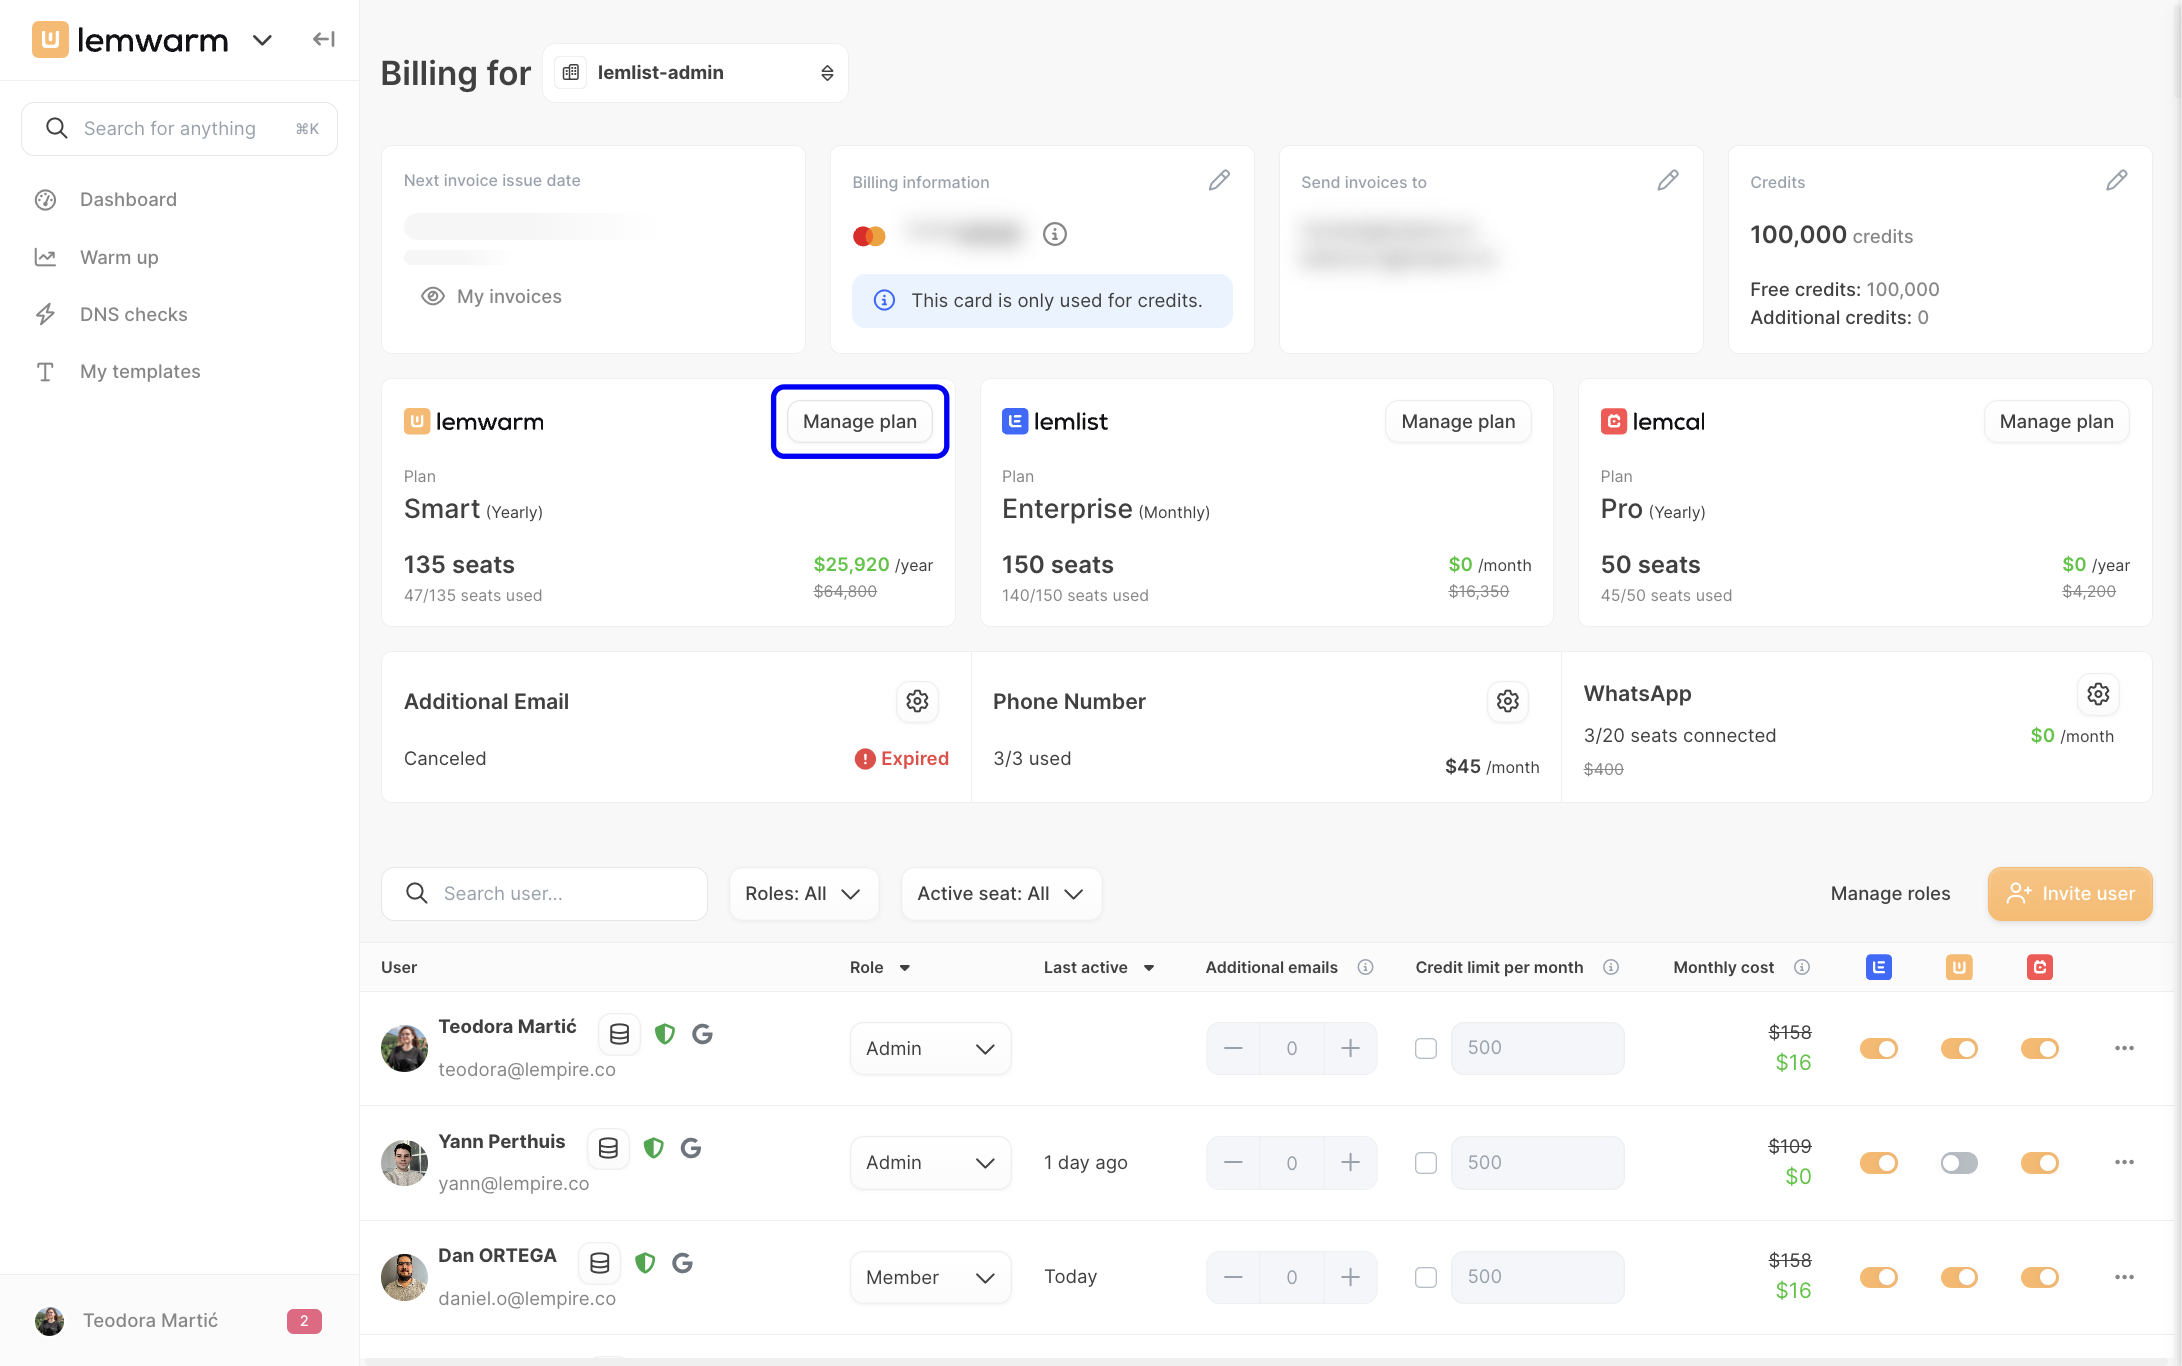
Step 2: Choose the right subscription changes
Inside plan management, you can adjust the number of seats, change your billing cycle, upgrade, downgrade, or cancel the plan. The reason to make these changes here rather than from the user list is that your subscription defines how many total seats your team can use.
- If your team is growing, increase seats before assigning access to more users.
- If your team is shrinking, first remove unused seat access, then reduce the seat count in your plan.
- If your budgeting process changes, switch to the billing frequency that best fits your team.
Phase 5: Manage seat access for individual users
Step 1: Review the seat management table
Scroll down in Plans & Billing to the user table. This section shows who currently has access and how seat usage is distributed across your team, which helps you decide whether you need more seats or can reduce costs.
Step 2: Deactivate a seat for a user who no longer needs access
In the user’s row, turn off the lemwarm seat toggle to deactivate their seat. This frees up a seat for someone else or prepares your account for a downgrade if you want to lower your subscription size.
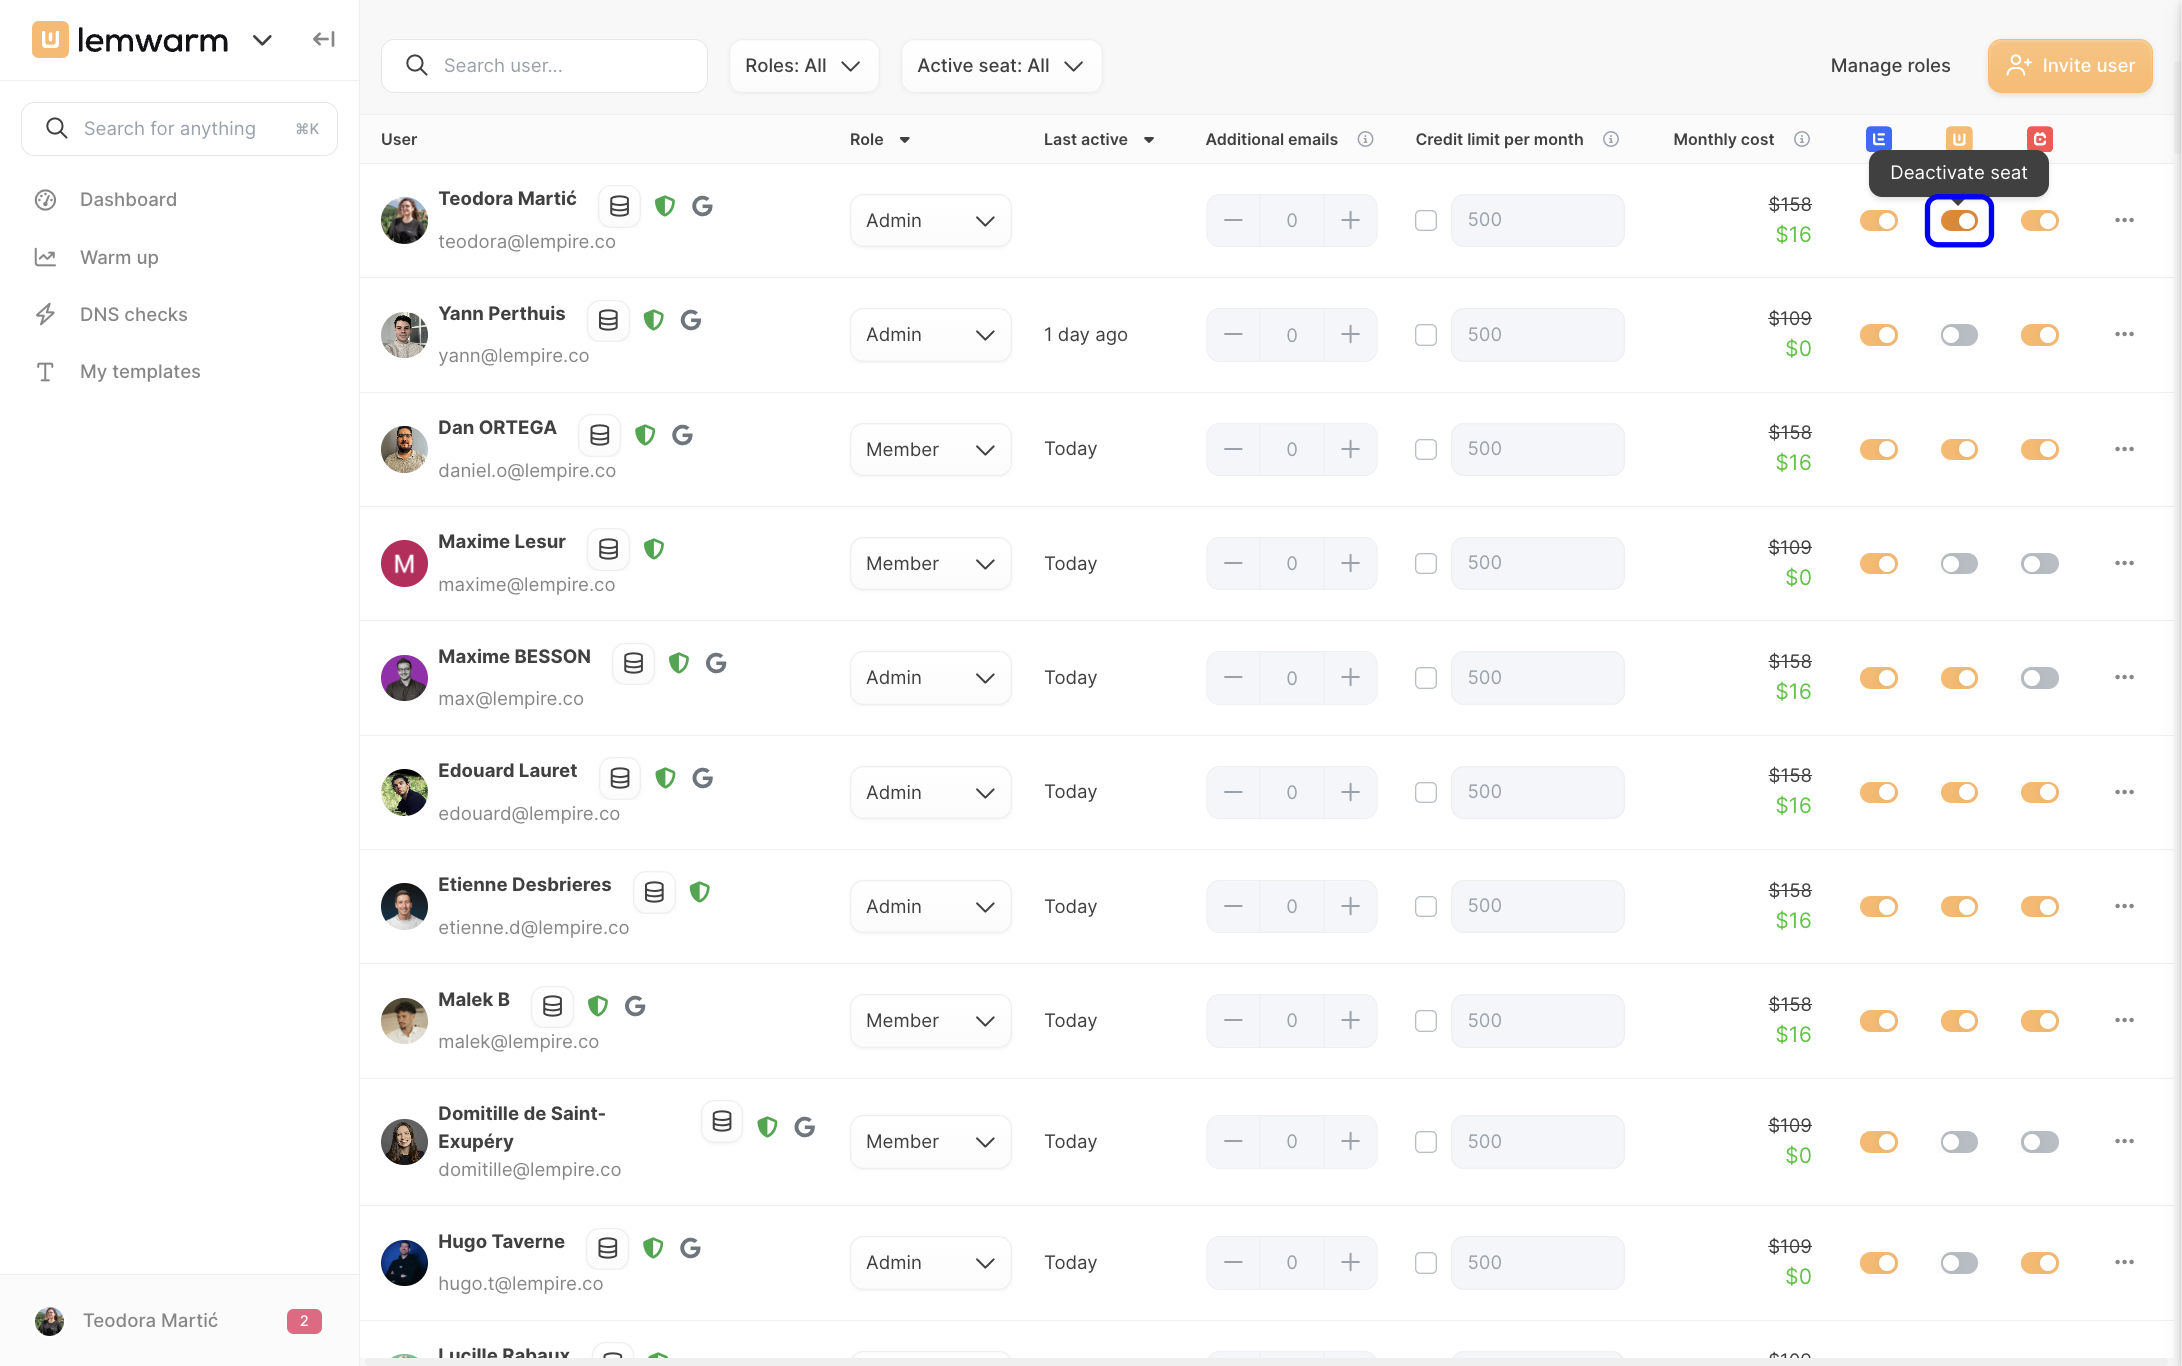
Tip: You can’t downgrade below the number of seats that are still active. If your plan includes more seats than you need, deactivate unused seats first, then reduce the seat count in Manage plan.
Phase 6: Switch between teams without logging out
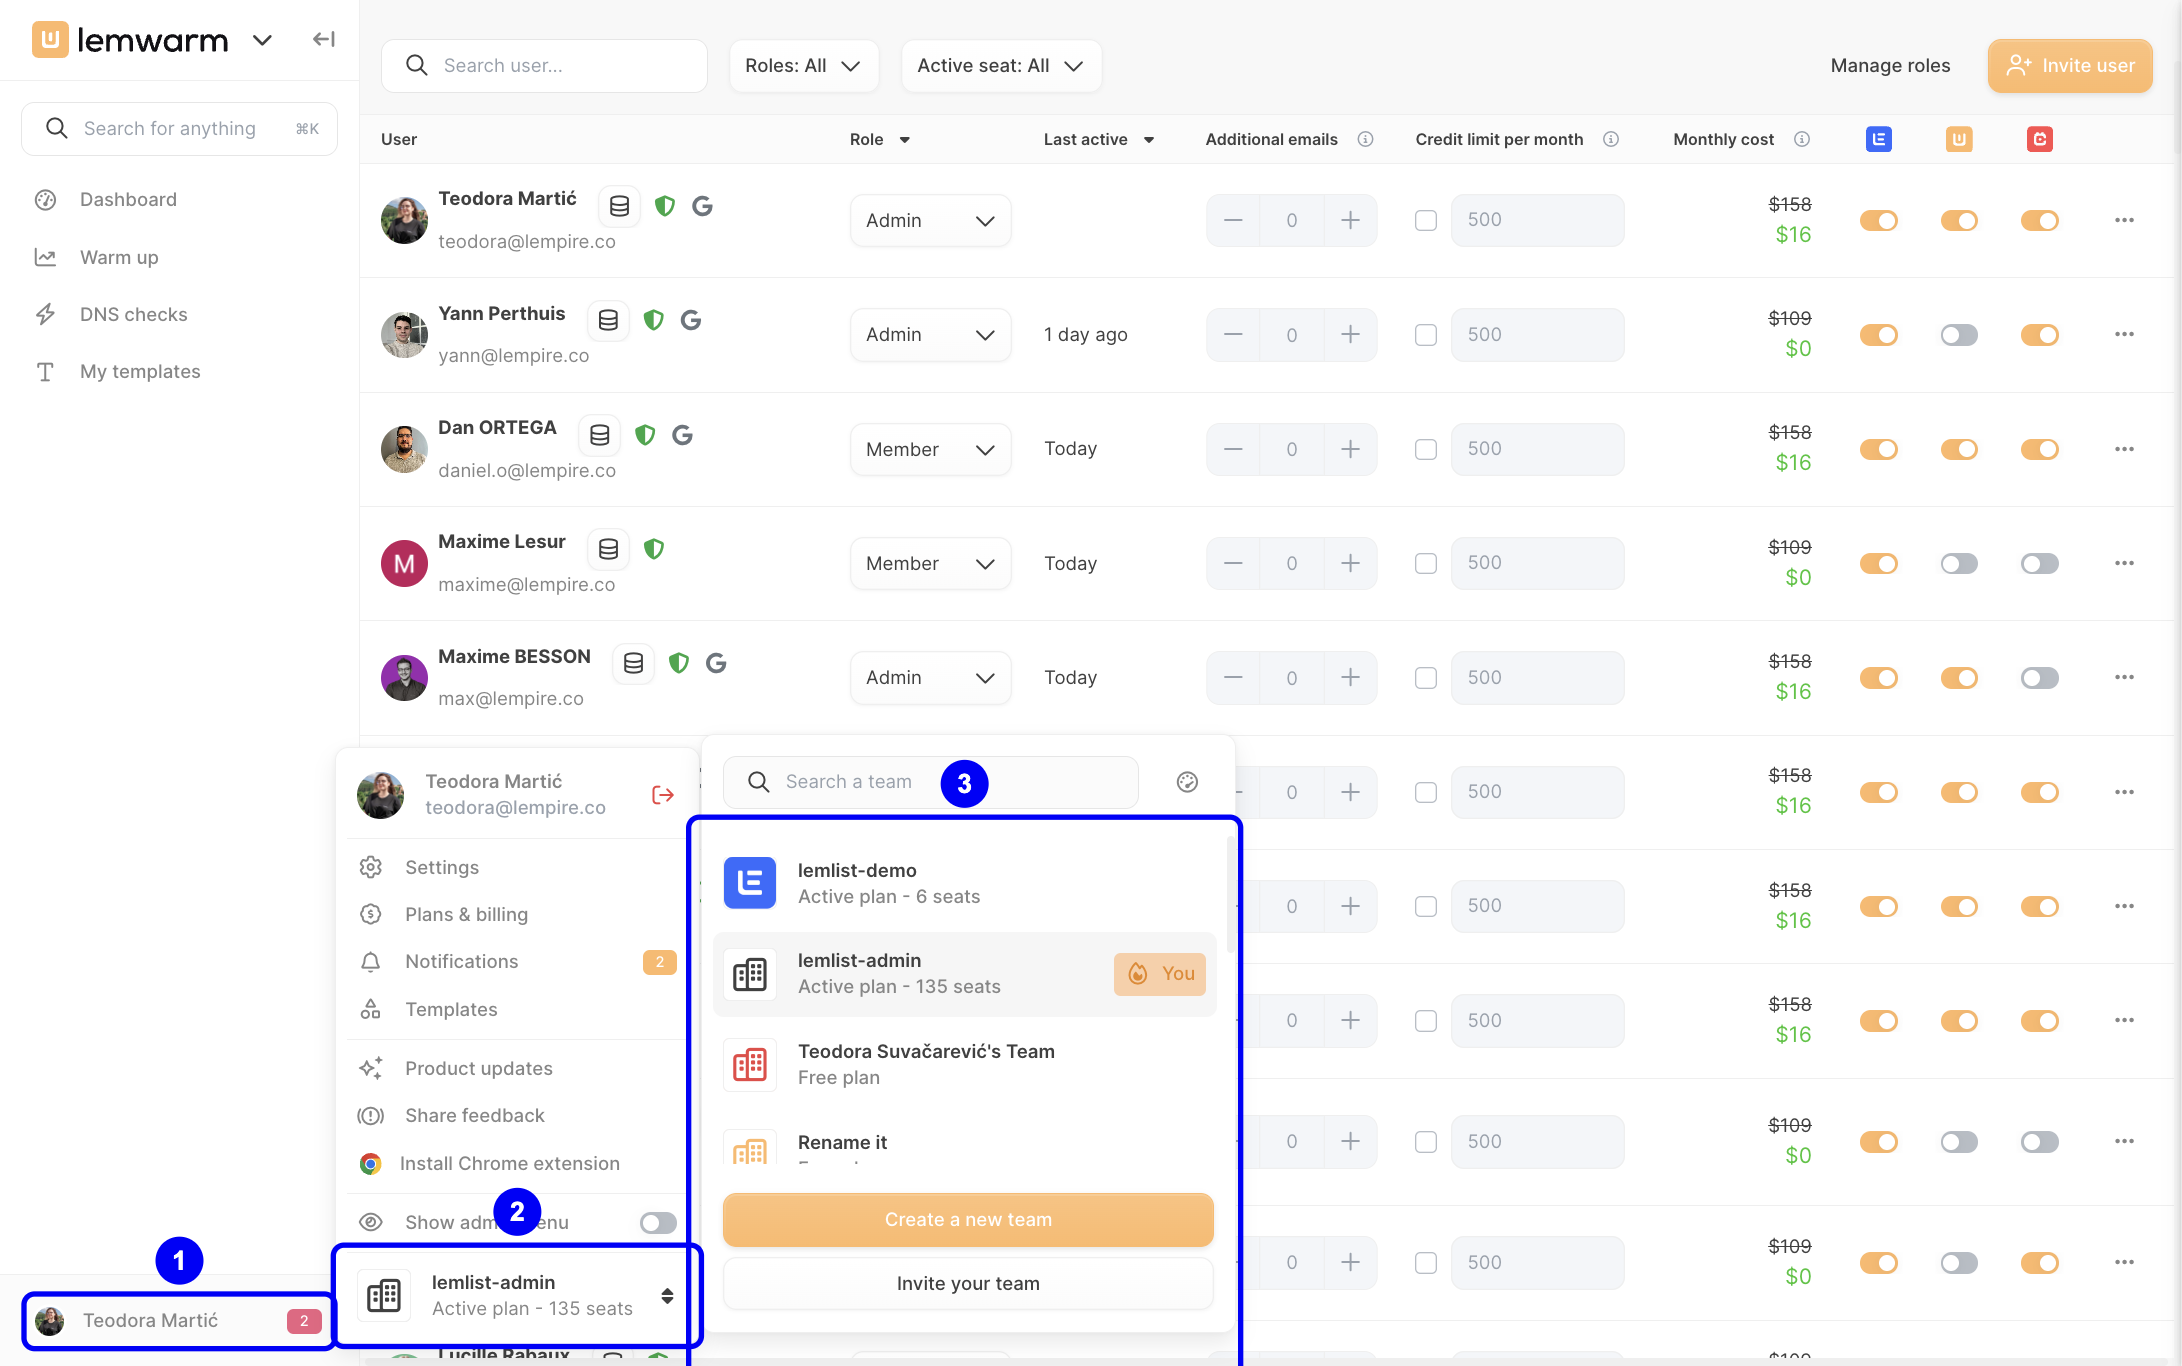
Click your name in the bottom-left corner, click your current team, then choose another workspace from the list or click Create a new team. This lets you manage billing separately for each team without signing out and back in.
Practical application
Example 1: Your team is growing
Suppose you need to give lemwarm access to several new teammates. You would open Plans & Billing, click Manage plan, increase the number of seats, and then use the user table to activate seats for the right users.
Example 2: Your team is reducing costs
If some users no longer need access, first deactivate their seat toggles in the user table. After that, go back to Manage plan and reduce the number of seats so your billing matches your actual usage.
Troubleshooting & pitfalls
Issue: I can’t see the Plans & Billing section
Root cause: Your account may not have Admin permissions.
- Check whether your role includes Admin access.
- If not, ask a current Admin to update your role.
- Refresh the app and reopen your profile menu.
Issue: I can’t downgrade my plan
Root cause: Too many seats are still active in your team.
- Scroll to the user table in Plans & Billing.
- Turn off seat access for users who no longer need lemwarm.
- Return to Manage plan and try the downgrade again.
Issue: Invoices are going to the wrong people
Root cause: Invoice recipient emails haven’t been updated.
- Go to the Send invoices to card.
- Click the pen icon.
- Add or update the correct recipient email addresses.
Issue: My payment method is outdated
Root cause: The saved card or billing details no longer match your current payment information.
- Open the Billing information card.
- Click the pen icon.
- Update your card details and billing address, then save.